Deploy A Website Using Publii & Netlify Under 10 Minutes

If you are serious blogger / professional / business owner who want to deploy a fast, secure, and scalable website without depending on heavy CMS systems like WordPress, then combining Publii + Netlify is one of the smartest choices you can make.
Publii is a desktop-based static site CMS that lets you build and manage a website offline — without needing a database, hosting panel, or server-side configuration. It is a beginner friendly but provide extensive options and functionalities to make more complex website depends on user creativity. Publii creates a safe, fast static website without all the hassle.
Netlify is hosting platform for advance web-developers to build, deploy, manage, and extend modern web apps—powered by agents, AI workflows, Git, CI/CD, extensions, and using serverless architecture.
This tool set is perfect for creating a static website to showcase your passion e.g blogging, photography, ideas, services, portfolios and the best thing is that you don't need internet connection to just write blogs for your website. It separate the writing and hosting for your convenience.
Below are the key benefits of using Publii and Netlify:
- Lightning Fast Performance [Static files + CDN]
- Extremely Secure Architecture
- Zero Server Maintenance
- Cost Effective (Almost Free)
- Clean SEO-Friendly Structure
- Complete Ownership & Control
- Perfect for Bloggers/ Business Owners/ Professionals/ Web Developers
- Ideal for Modern Web Standards
- Flexibility [Move Your Publii Database To Other OS platform or Hosting Platform]
Now lets start building and deploying our website using Publii and Netlify.
Setting Up Publii For Your Website
1. Installing Publii CMS :
- Go to their official website to download the Publii software for your computer.
- Depending on your system follow the steps to install Publii in your computer.
- Once installation done, you can find the app launch icon under your start menu or desktop.
you can check the official documentation for more information about installing publii for your operating system.
2. Creating New Site :
- Find the Publii application launcher in your computer's start menu and double click to launch it.
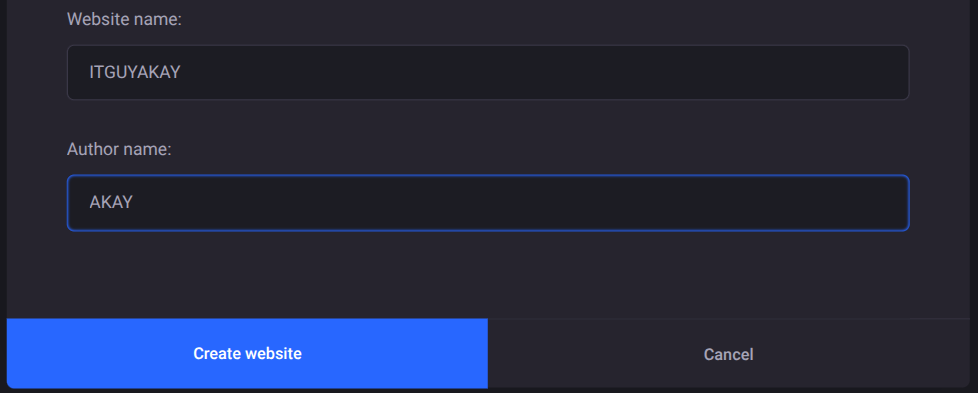
- Click "Create New Website" button on your screen to create a new website.
- Click that button and it will show you the below screen.
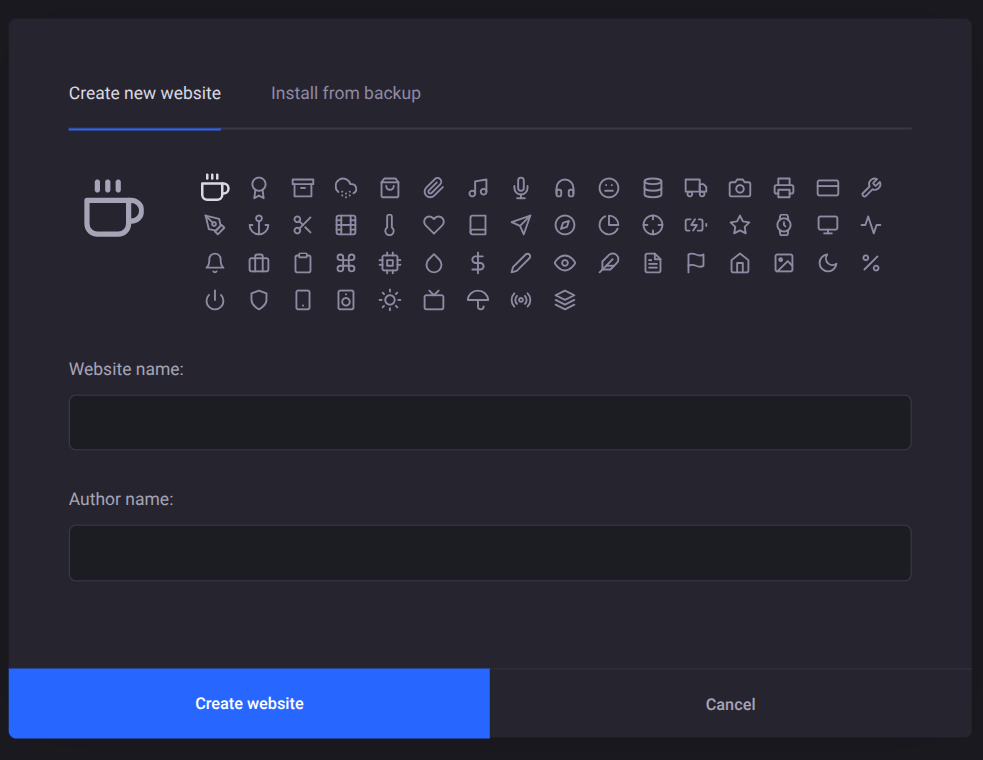
- Enter the website and author names in their respective fields and click create website.
Don't worry about naming, these fields are just for locally saving your website and will not impact on your live website.
- We have successfully created a very basic website in our local system. Now we have to modify our website as per our requirement
3. Setting Up New Site :
- Once you create a new website, you will land into your website's main setting page,where you will all the required options to build your website. see below image.
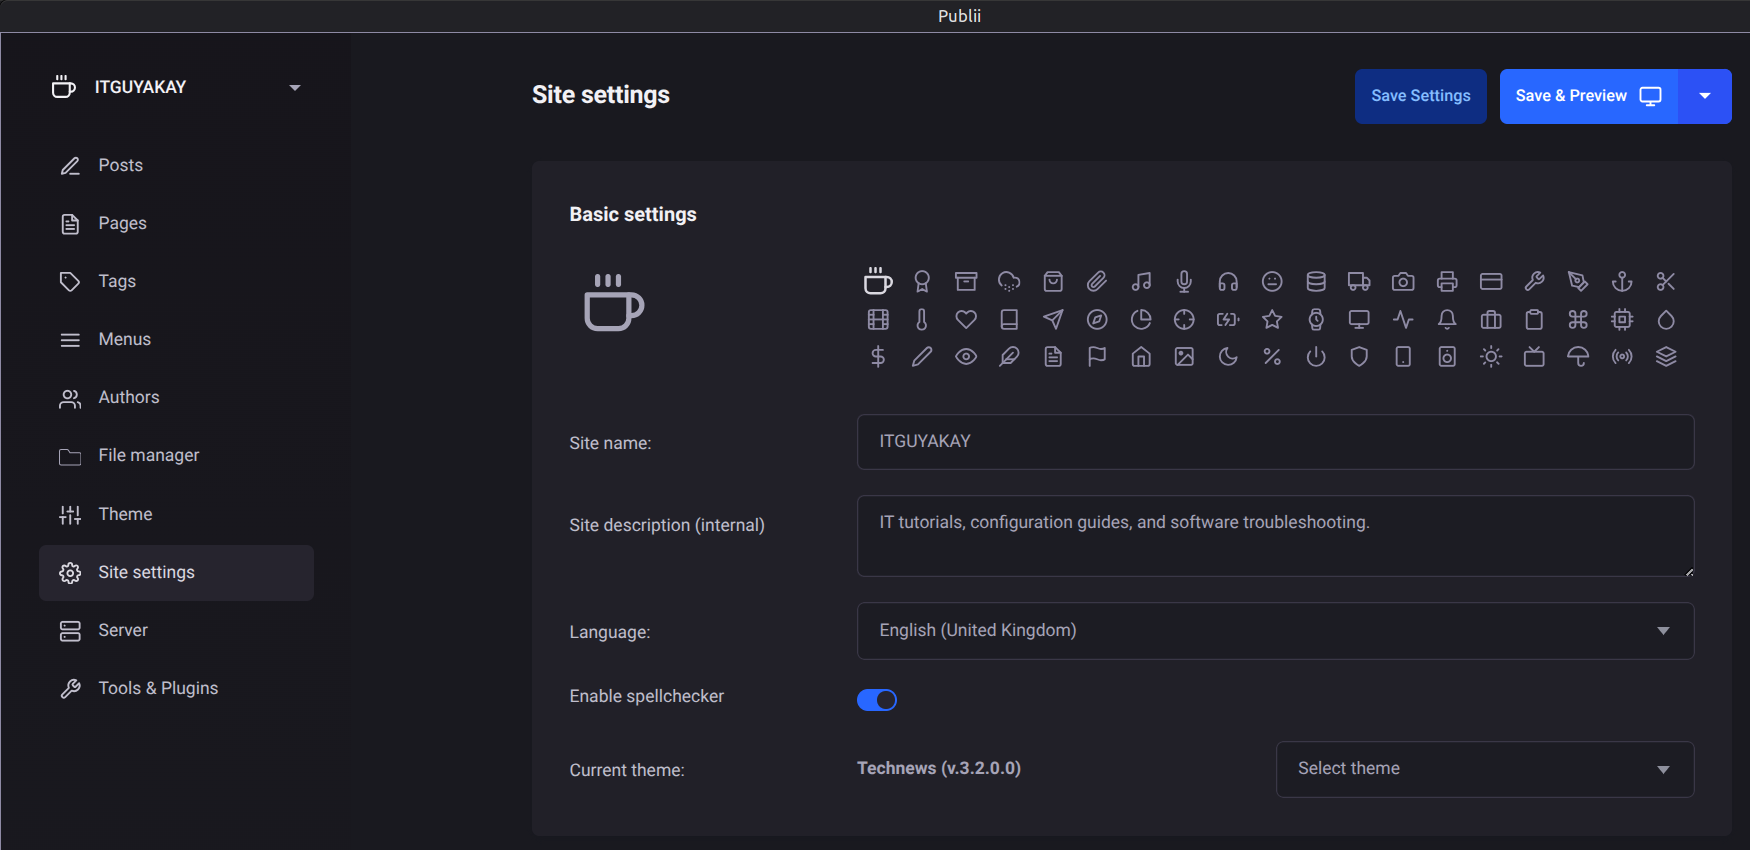
- The very first option we have to setup is the current theme. You can download the desired theme for your website from Publii's Official Marketplace.
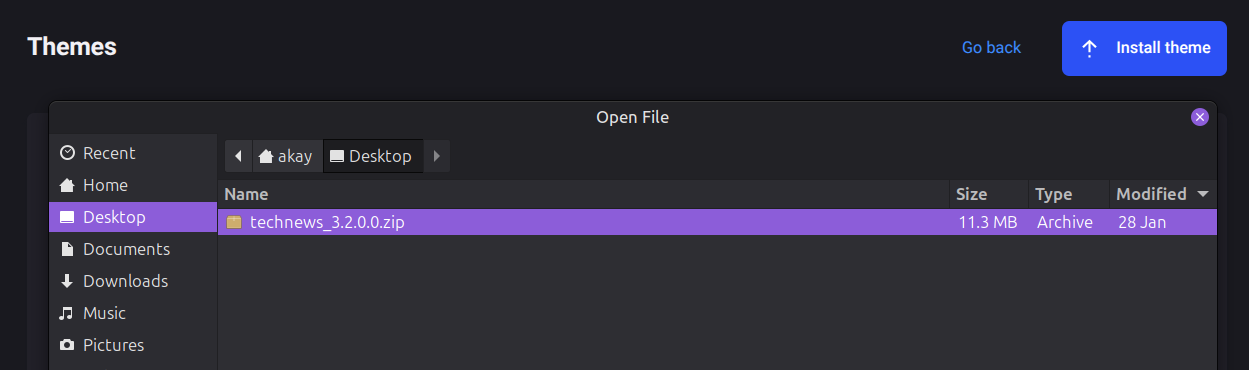
- Download the desired theme for your website and click the three dot option icon. see image below.

- Click theme option > install theme > navigate to your downloaded theme zip file > select file and open.
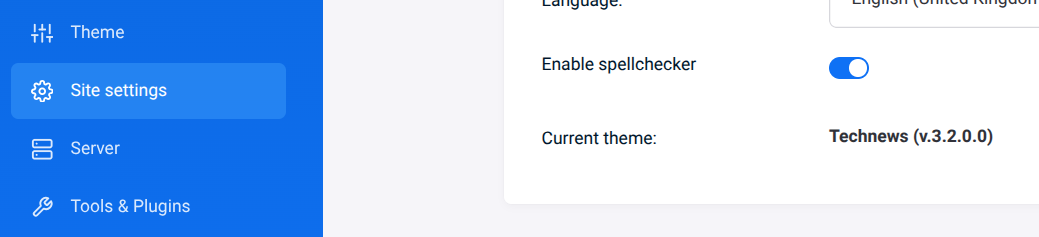
- The theme will be added to your Publii CMS tool and you can use it in Current theme option under your Site setting.
- Once the theme is setup, you are ready to modify the other settings for your current website under Site setting options.
- Most of the setting will work for you default however some options are arguably depends on your decision how you would like to present your website on internet.
Please refer the official documentation for all the options available under Site settings.
- Some of the recommended settings are as below for blogging perspective.
#URLs
Pretty URL → ON
Post prefix → Empty
Tag prefix → tags
Pretty URLs → ON
Index.html in URLs → OFF
#Sitemap
XML sitemap → ON
Tag pages → ON
Author pages → OFF
Pagination → OFF
External images → OFF
4. Setting Up Theme :
- Setup the theme options as per your website design.
- Set fonts as per your website design.
- There are plenty of other free plug-ins available for at Publii marketplace
- If you want to enable the search & sub-search option for your website , make sure you must install the search plug-in in your website.
- Adjust the colors scheme for your website under colors options.
- Modify footer text under footer option.
- Make other options default.
5. Other Settings :
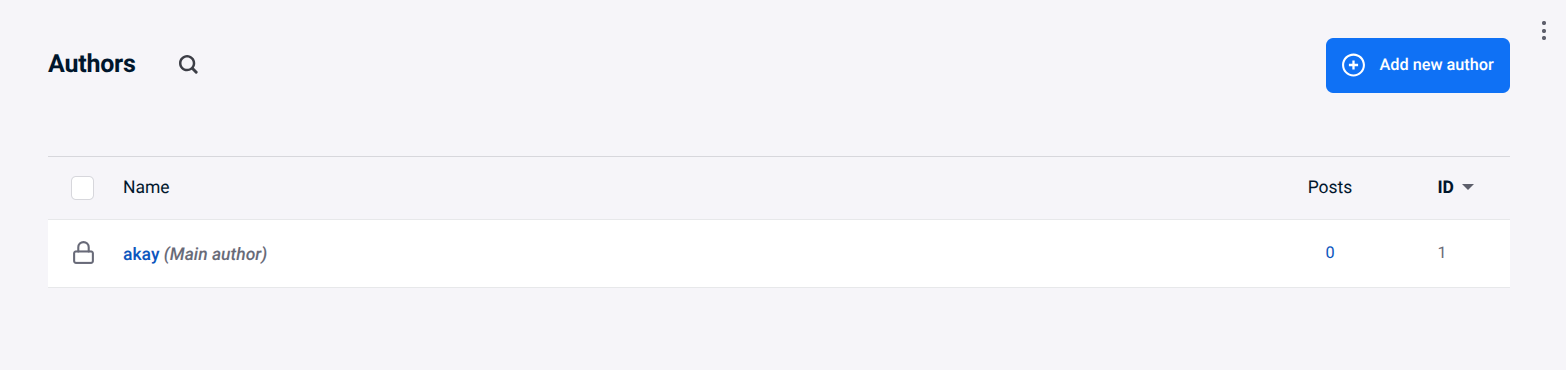
- Author: In author option you can setup the authors list for your website, you can add name, description, email, images and SEO settings for a particular author if you have multiple authors website.
- Tags: The tags options allow you to add tag in your posts, pages and sub-menu. You must have to create some default tags which you can use to add to your sub-menus pages, so when a user click sub-menu link in your website it should redirect to a tag specific page.
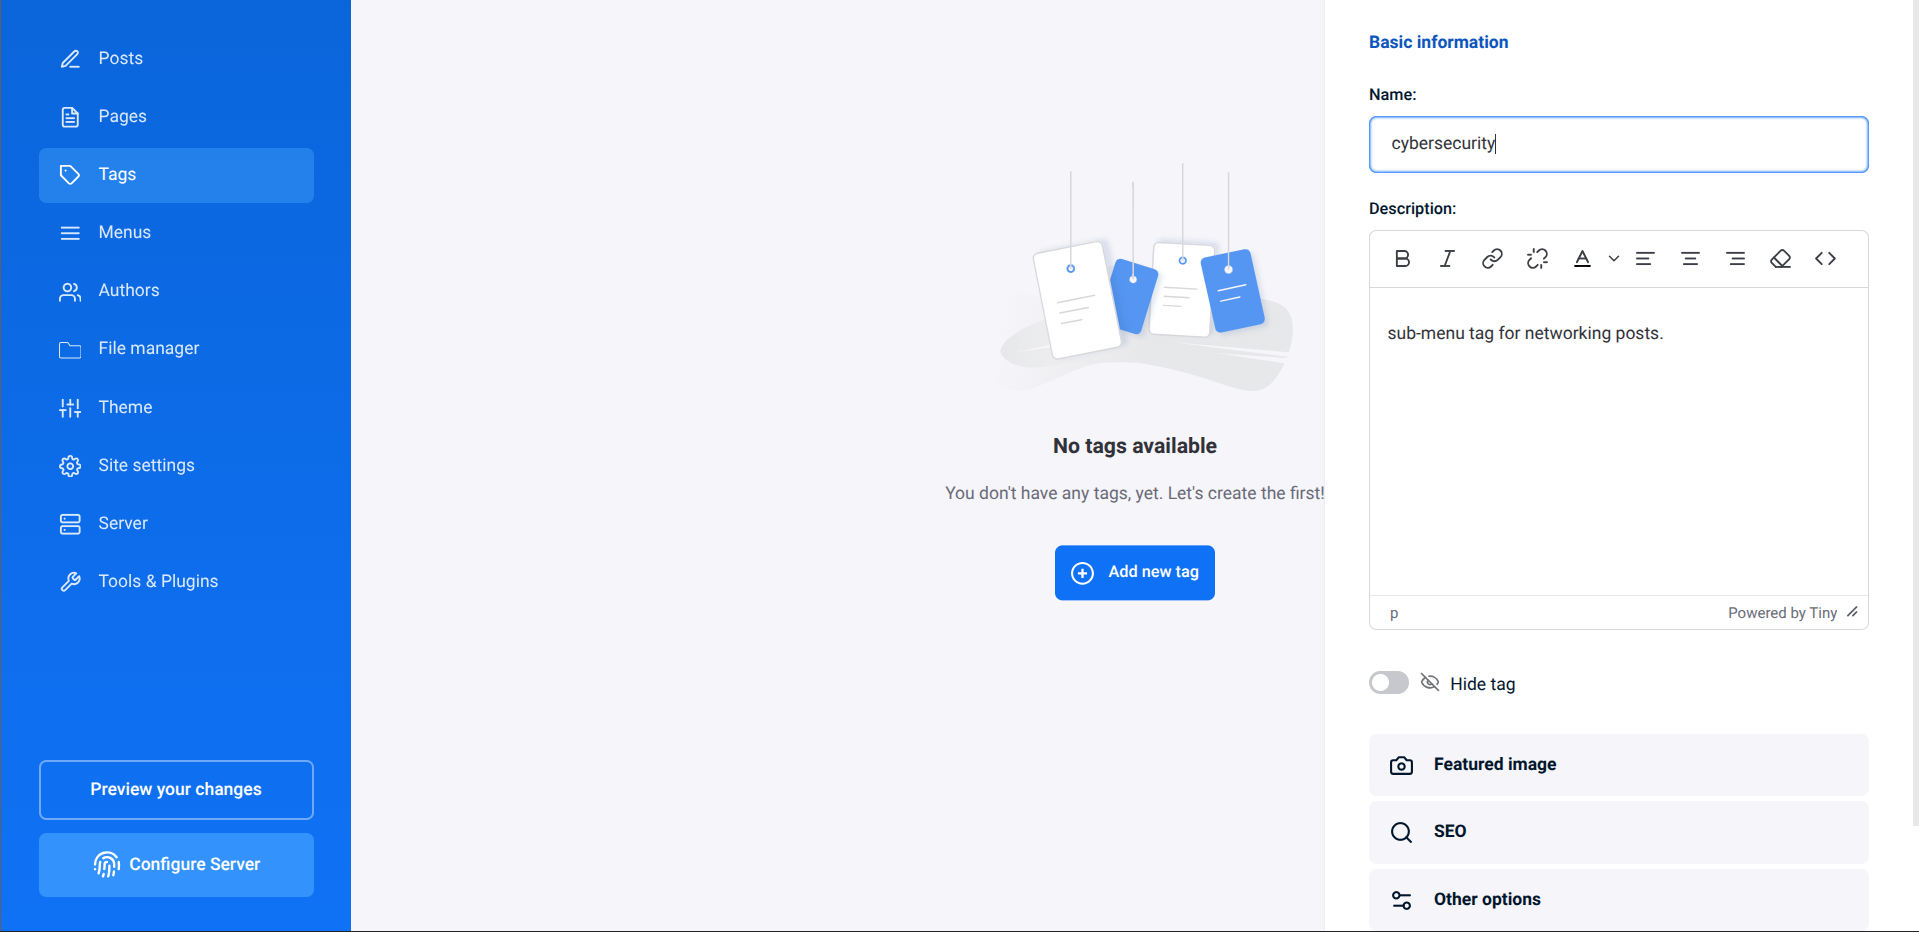
create each tag for each sub-menu. later you can create more tags for your blog-posts.
- Menus: Now create menu and sub-menus under the Menus option of you website.

- Pages: Now create some static sub-pages which tells about your website. you can create some pages e.g About, Privacy, Contact, Disclaimer etc. and add them on footer or header.
- Posts: Here you can create new blog posts to update your website with latest information.
Note: Keep using preview option to check changes to your website.
Setting Up Netlify Account For Your Website
Now as you have created Publii website successfully, its time to connect it to your Netlify account.
Follow the below steps to setup Netlify account:
- Visit official website of Netlify to create an account using signup option.
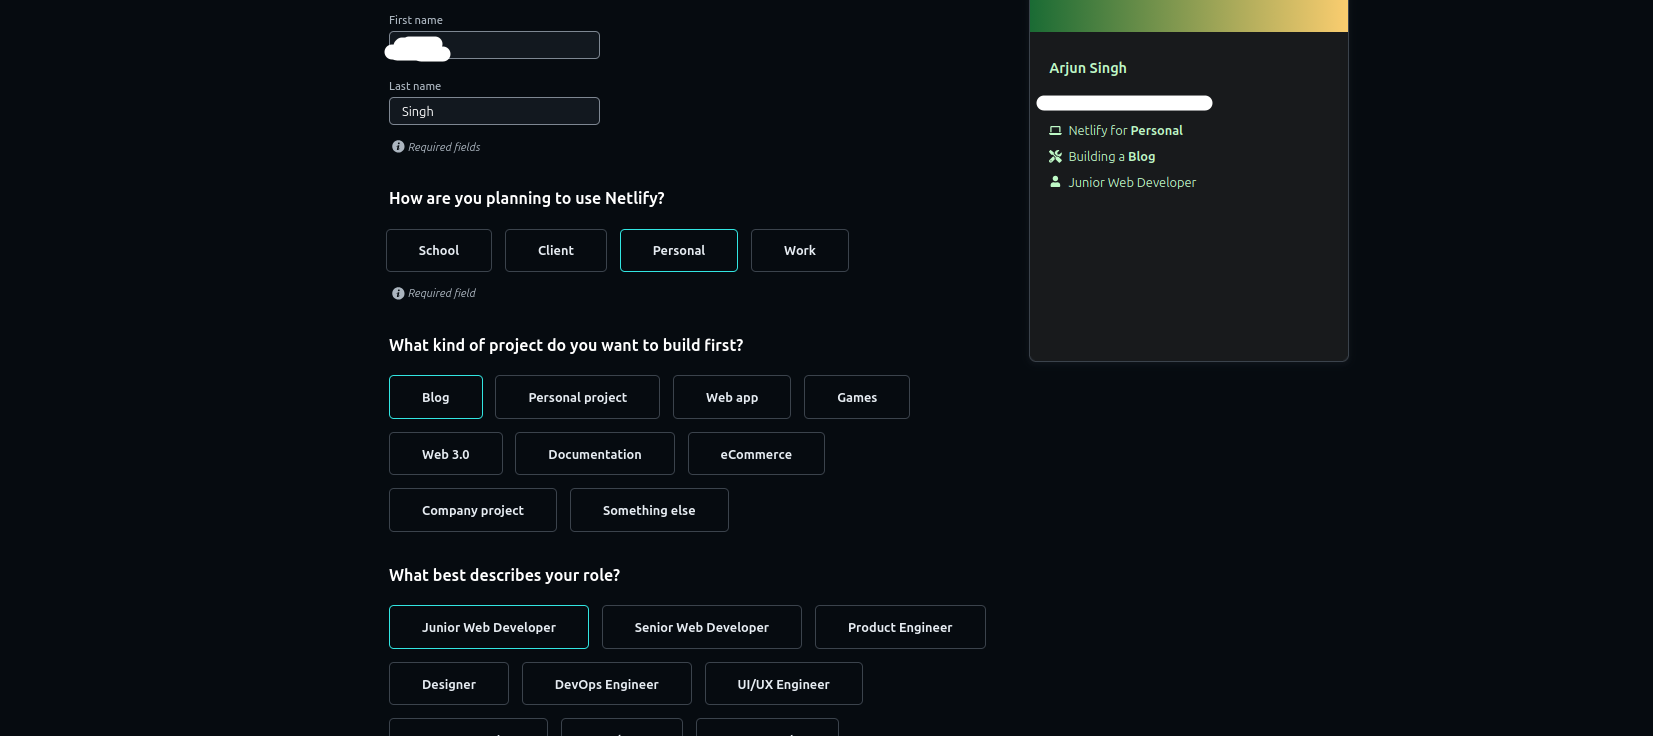
- It will ask you to fill-up your personal information e.g name, project type, role etc to create your account.
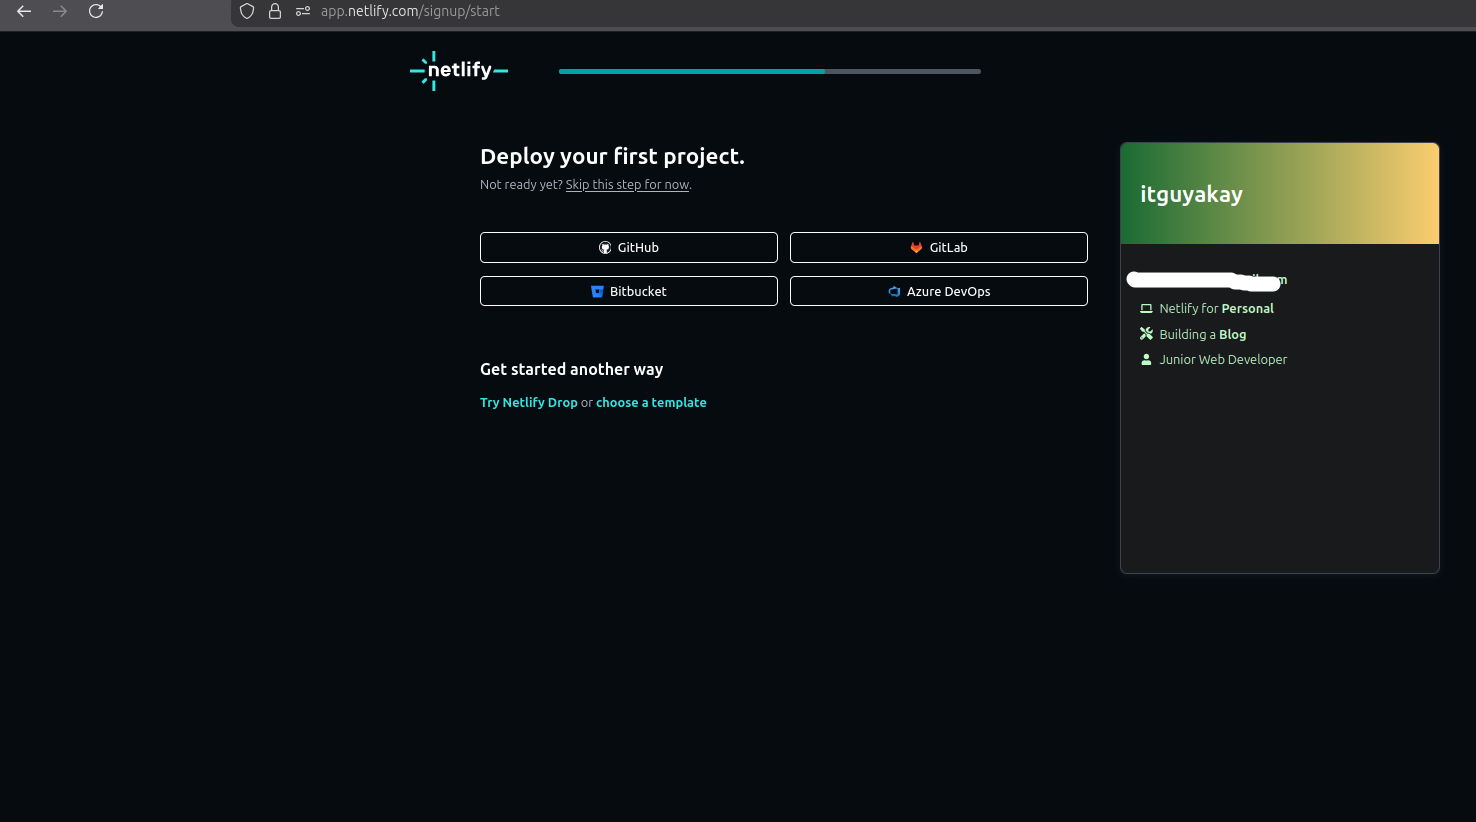
- In the next page it will ask you to `Deploy your first project` , skip this option for now and land to main dashboard.
- In your Dashboard, you will see create a new Project option.
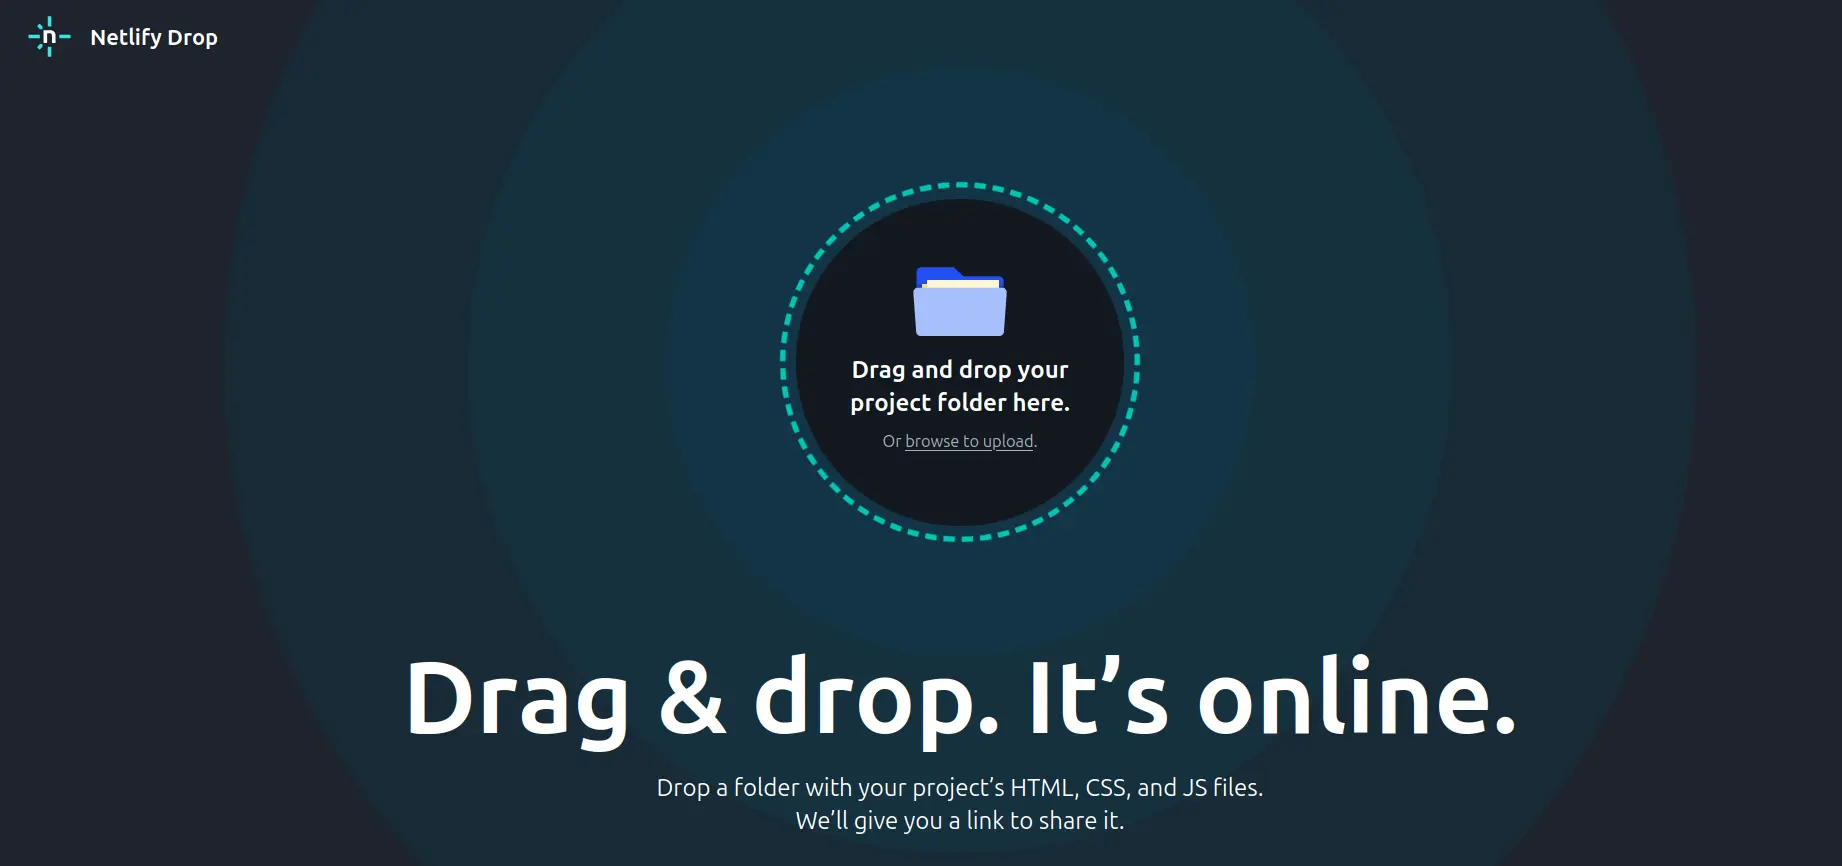
- Click new project option and select Deploy manually.

- Create an empty html file and zip it and drop the file using drag and drop or navigate to the file to upload. Download empty zip file from here
- Once the file has been uploaded, you'll see the Deploys screen; Netlify automatically creates a site name for you. e.g
your-site-name.netlify.app
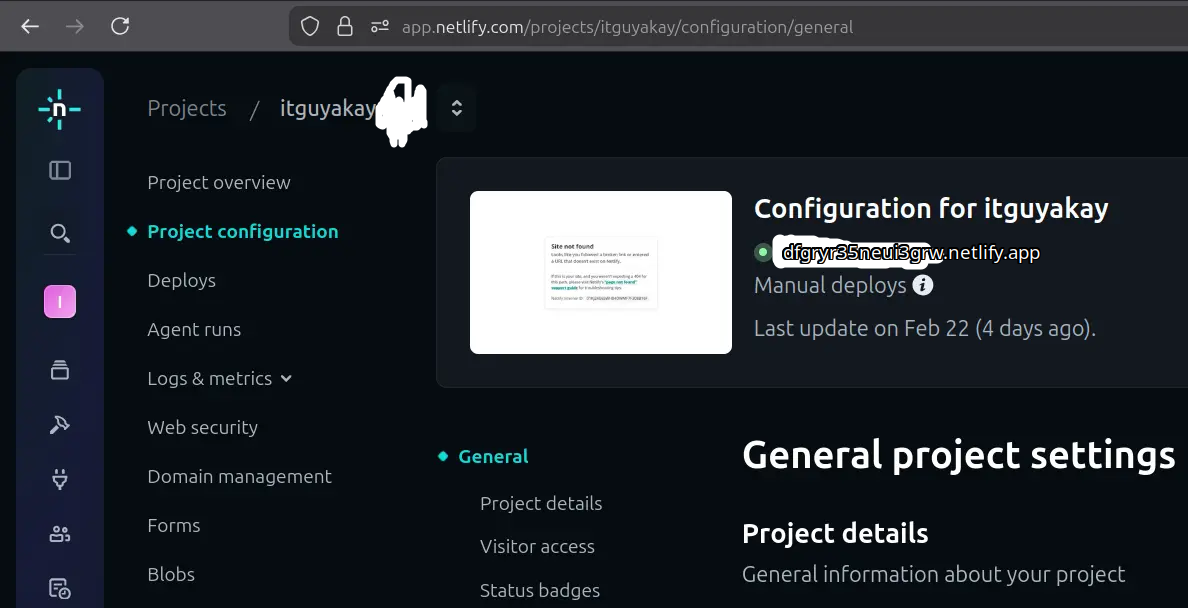
Note: You may change your website URL if you want a meaningful name e.g itguyakay.netlify.app
- Go to Project Configuration option and note down your Website URL and the Site ID.
- Now click your Account icon option ( below left on the screen ) and go to OAuth option.
- Create a new Token for your website.( Don't Share Your Token ID ).
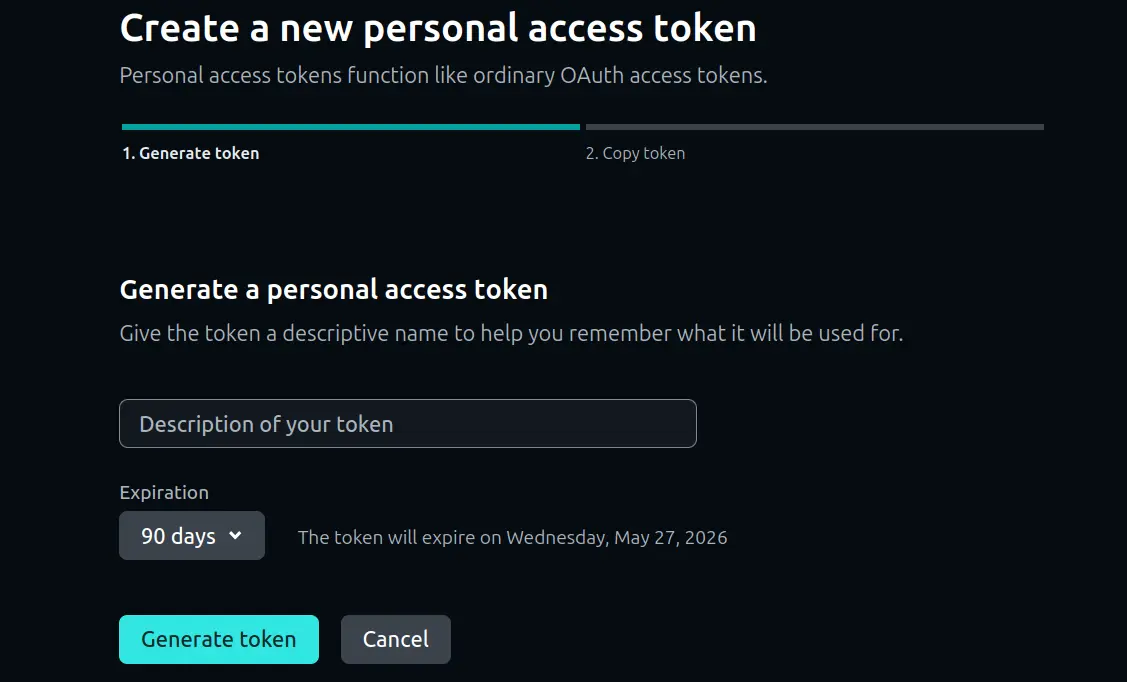
- It will ask you to set expiry date, short expiry date for testing or sensitive website e.g selling product or services and long expiry date non-sensitive website e.g blogging, portfolios etc.
- Note down your Token ID, website URL, Site ID.
- Go to your Publii Desktop app and under your site > click Server option.
- Select Netlify option and put the entries in their respective fields.
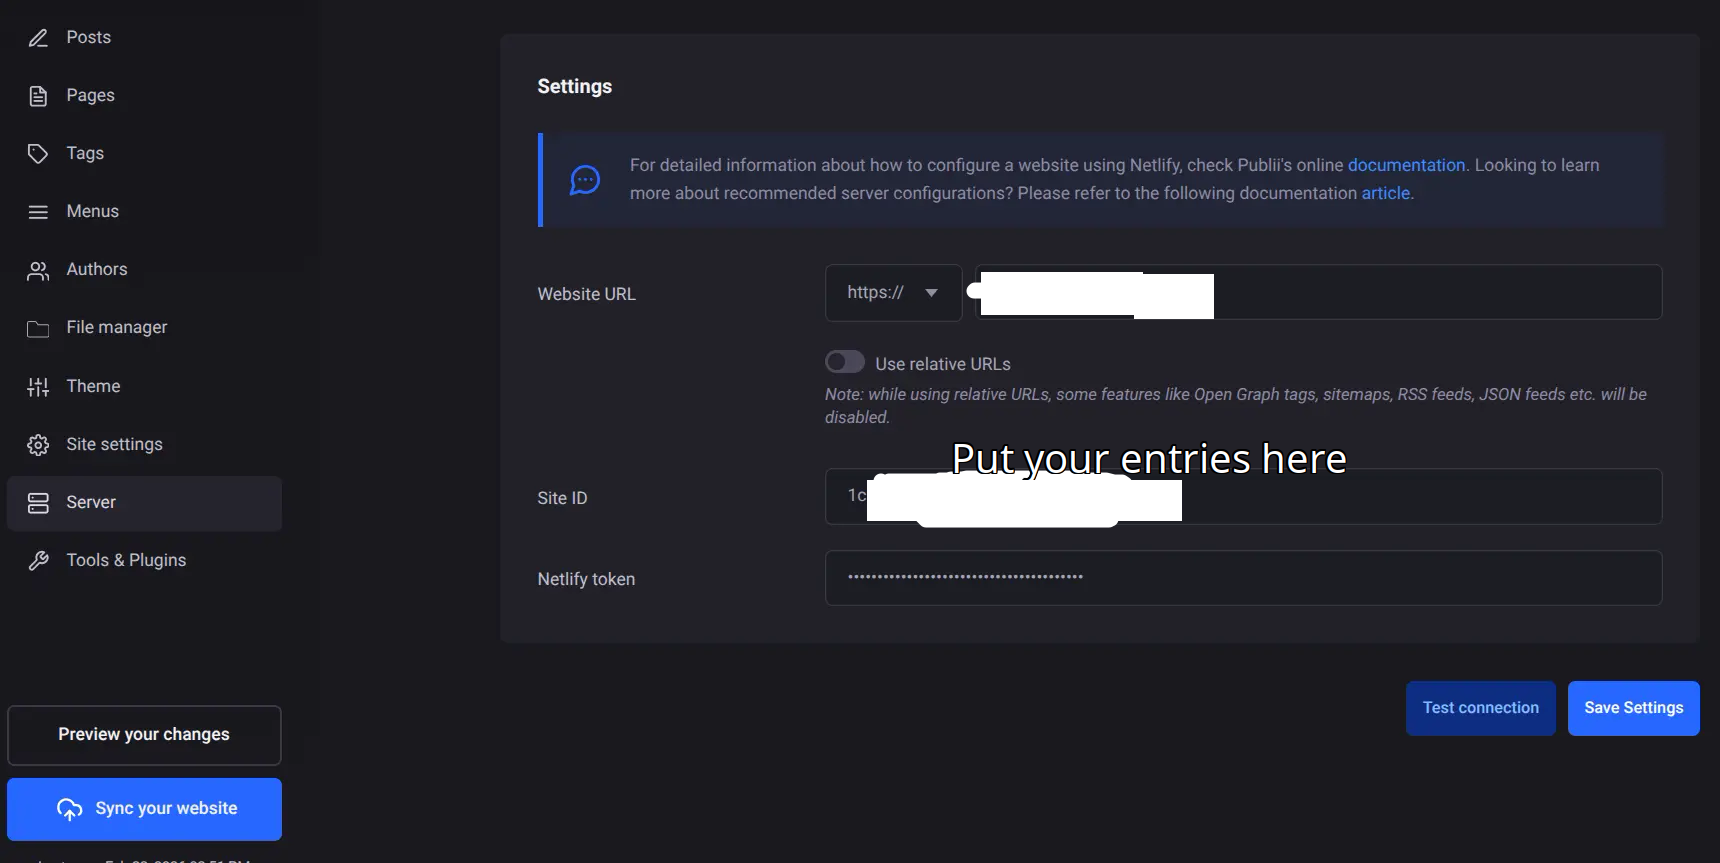
- Click Sync your website option and wait to get it sync.
Congratulation ! You have successfully deployed your first website using Publii + Netlify.
Note: You might need to enable some extra settings in your Netlify account e.g setting up your own domain, changing default URL, enabling Forms detection feature, Firewalls, Two Facto, Plugins etc.
It takes huge efforts to create such a long post. If you find this post worth please share it with others as well.. 😊